Our house has tons of cabinets. The plus is that we have so much storage space. The negative is that they are all the 1970's faux wood laminate.
Oh man, oh man. There is no love lost between me and these laminate cabinets. It will be a happy day when we can replace them! It will also be a day in the very far-off future. Lots of cabinets mean lots of $$$$ and I can only imagine the tens of thousands of dollars it will cost to replace them all when the time comes. For now, I could just learn to live with them, I know. But as I was thinking about it one day, I felt like there had to be an affordable way to give them a face lift and help me love them. And after this makeover, love them, I do!
I started off by painting the room. Then it was time for the cabinet facelift....
For the cabinets, we decided to add some trim around the front for a raised panel feel. First, we removed the doors. We started off with pieces of 7-foot composite wood trim from Lowes. Each piece of trim was around $6.00. After we measured the doors, we cut our pieces with a 45 degree angle using the miter saw. We nailed them onto the cabinet doors using a nail gun and 3/4 inch brad nails. We filled the nail holes and any other places where our corners might not have met up perfectly with spackling. Next it was a coat of primer (the original oil-based Kiltz is what we used) and two coats of paint using a mini-foam roller. While the doors were drying I went inside and put a coat of primer on the cabinet bases and also two coats of paint. When everything was dry, we reinstalled the cabinet doors and DW installed the new hardware. The total amount of time spent on the cabinet redo was around 5 hours. The cost of the trim was right at $100.00, and since we used paint we already had, this was all we had to buy! I think it's a small, small price compared to results!FINALLY, here's the before and afters:
I hope my pictures will stay in order.... I'm not going to go through and label them all "before" and "after"... You'll be able to tell the befores from the afters, I'm sure! (at least I hope! Ha... if it's brown cabinets & white walls, its BEFORE!!)


.JPG)


(before)

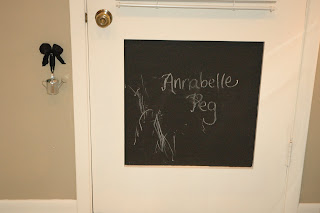
It already had a square space on the bottom half that I thought would make a great chalk-board surface for AB. So, a couple coats of chalkboard paint and I hung a tiny watering can to hold her chalk beside it...
 it's been a hit for sure! She loves it!


 That was the truck that my parents' dog, Rex, used to jump in, slide down the side and scratch, every time Devin would come over for dinner....we were too new into our relationship for him to dare say anything bad about the family dog, so he'd just grit his teeth and cringe every time Rex would jump in...ha...


 ~amw~
~amw~


 I'd seen these before, and after swinging on it, I think I have DW convinced that we NEED one our front porch! I took detailed pictures of this beauty so that my Dad can make me one! My Mom & I do that EVERYWHERE....we fall for something then utter the all-familiar phrase, "Daddy could build that!" So this is definitely added to the want-list!


